Showing posts with label Craft. Show all posts

9.16.2011

chevron

Here is the step by step, in pictures, of the process of making the chevron paintings. The original was one large canvas, instead I used 2 12x12 canvases.


I split the canvas into 4 equal sections.  To start the chevron lines, I measured maybe an inch down the two outer most lines. From there, I used the ruler to find an angle I liked and drew it in to connect the first line and the left edge. Once I had the first point on the left edge of the board, I measured straight across and made a dot on the middle and right most edge of canvas. From there it's connect the dots. I varied the width of the lines, but its easy once you have your starting line.


Taping was actually the most time intensive. First I set up two long stripes diagonally, so they fell inside the first and third diagonal line. This will let you paint over the pencil lines originally drawn in. Taping also has to be done in steps, not every other line can be painted in at once because of the variations in line thickness, and the width of tape. I didn't really have a method here. I outlined as many grey lines as I could - once those were painted and dried, I took the tape off and added tape to the other lines I was not able to get the first time around. Once the two outer columns are finished and dried, you can begin to work on the middle columns. 


All my tape!


Finished product!


Here is the link to the full tutorial over at Studio 5

9.01.2011

One-Lump-Or-Two

I know I'm not the only one out there who loves the lamps from Anthropologie, but really doesn't have a few hundred dollars to dish out for them.  The One-Lump-Or-Two lamp has been on my wishlist for what feels like years, with no sight of a sale coming any time soon. The next best thing? Look for a DIY!


Isn't her version so pretty? I actually might like it better then the Anthro version, but that might be because I'm doing my new room in white, gray and yellow.

Here is the entire tutorial - which actually looks pretty do-able.  I'd love to hear if you have recreated this lamp and have any other tips!

8.31.2011

I found it!!


Remember my Rhododendron Chandelier post??  WELL, I was on Pinterest (really, what did I do with my time before finding this site?) and found a tutorial on how to make one that looks so similar to the real thing!

Real Thing:


Saucy Glossie's


Here is a link to her page to find out the instructions!

Enjoy!

Lace decoupage

Modge Podge is going to become my favorite new craft item! The first time I ever used it was for my tile project below, and since have been searching for different ways to use it. This is my favorite by far!


Aren't these beautiful! I really am a sucker for anything lace.  I'd really like to make a whole drinking glass set out of these, but don't think that's very safe. Maybe I'll just settle for a few vases!

I'm moving tomorrow and have already started a few projects for my room.
Cant wait to share them with you!

8.17.2011

Reason #32 why we should drink wine!


Sorry for my lack of posting!  I am on vacation and in the process of moving, so my life is all over the place and haven't had any time for crafts! I'll get back to it soon!

I thought this was a really cute idea and a great way to use all those left over corks.

8.05.2011

Amazonite and Carnelian

There isn't a specific necklace that inspired this piece, but maybe a few. I've seen so many necklaces in stores that have been combining various colors, shapes and sizes of beads, but had nothing similar in my jewelry box.

I knew I wanted to make something with some a few different, larger stones.  I love Amazonite and a warm carnelian together and just added in touches of pink. 


My favorite thing about this necklace is the amazonite teardrop cluster. I use clusters quite often, but usually in repeated patterns. I love the way it looks on its own!


I have some crochet projects to hopefully do this weekend but also some packing, so we'll see which comes first!  

Enjoy your weekend!

8.04.2011

love


'


I'm going for very simple and inexpensive for my next bedroom.  This set of canvas would retail for over $100, but is very simple to make. Canvas, paint and a little creativity is all you need.

7.28.2011

overgrown crochet circle

Source: etsy.com via Katie on Pinterest


I would love to learn how to make this crocheted rug or have someone who knows how to crochet make it for me (hint, hint)!

4.23.2011

Marbleized Easter Eggs

From Epicurious
 Who doesn't love dying Easter eggs? Who loves eating a dozen hard boiled eggs after?? 1 or 2 ok...but 12? That's just asking for a stomach ache.  So make your stomach happy and remove the yolk out of the egg before dying them. This also allows you the keep the dyed egg shells for as long as you like.

I found these instructions from Epicurious that show us an easy way to remove the yolk from an egg: 

*Leave the eggs in the carton while you pierce them. Place the pin point-down against the top of the egg and lightly tap the pin head with the back of the spoon until it pierces the egg. Insert the wooden skewer into the egg and gently press it down until it pierces the bottom of the egg. 

*Remove the egg from the carton, hold it over the glass, and push the skewer up and down through the contents several times to break the yolk. Remove the skewer and place a straw over the hole. Blow through the straw until the contents of the egg are emptied into the glass. Rinse blown eggs in warm water and dry with a paper towel or let them dry in a clean egg carton. 

*Before decorating, gently wash the inside and outside of the empty eggshells with dishwashing detergent and rinse them. If water remains inside a shell, use a straw to blow it out. Let the eggs dry thoroughly on a rack (see tip, below) or in their carton. 


I love the way the eggs shown above were painted. The marbleized effect is fun and mature...perfect for both kids and their parents.

 Here's what you need:
  • Enamel hobby paints: green, lavender, and purple, or colors of your choice
  • Disposable aluminum roasting pans, one for each color combination
  • Rubber gloves
  • Wooden skewers
  • Blown eggs, as many as desired, clean and dry
  • Coffee filters

1. Decide the color or combinations you want to use—you may use one or more colors of paint for each marbling bath. 

2. For each bath, fill a roasting pan with about 4 inches of water. Put on the rubber gloves. Add about 1 teaspoon of each color paint in the chosen combination. Swirl the end of a skewer through the paint. 

3. Place an egg on the end of a skewer. Swirl it around through the paint and water. When the paint has adhered to the egg in a marbled pattern, remove the egg from the skewer to an egg carton and let it dry.

4. Repeat this process for each egg, using the different color marbleizing baths as you wish. 

5. To dispose of paint responsibly, pour each bath slowly through a coffee filter, letting the water drain down the sink and capturing the paint. Throw away the paint. 

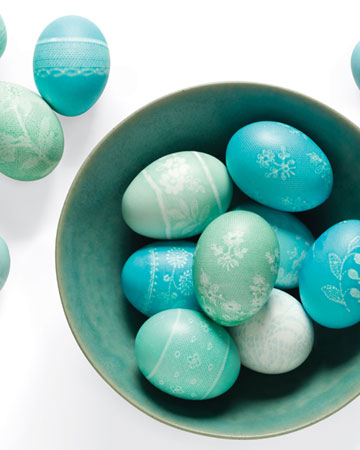
Some other designs I love...


From Martha


More Marbleized from Martha


Whats your favorite way to decorate them??