5.31.2011

Color Play: Pink and Orange

I love playing around with color. Inspiration can come from everyday things...

Photobucket

and turns into this...

Carnelian and Pink Quartz

and this...

Carnelian and Rhodochrosite

5.27.2011

Etsy Artist: Keep Calm Shop

Many people have done their own spin on the Keep Calm saying, but these are the best by far....


My favorite:

You can find these and more sayings at the Keep Calm Etsy Shop.

What I'm Working on this Weekend...


Check back next week to see the finished product!

5.26.2011

bolts and braids

Found via Truly Smitten.

I'm loving the chevron pattern...so much so that I want to run out and buy some bolts to make this pretty little bracelet!

5.25.2011

Cabochon's

 Every where I look I am finding large cabochon style gems and jewelery...

You can also find them on my previous post here.

If you want to create your own, I have two different styles of beads with cabochon inlay available on Etsy....


Coral

Turquoise

Available in coral and turquoise, these beads would be perfect for necklace or a pair of earrings. I would pair the turquoise with some larger citrine stones and the coral with a mix of carnelian.

Check out my Etsy shop for more information on these and other gems!

5.23.2011

Picking out Clasps


There are tons of choices out there when it comes to clasps. For those of you who love options...this is great, but can be overwhelming for those who dont.

Lobster Clasp - Most basic clasp. Comes in different lengths depending on the size of the piece you are creating. Most basic, blends in with chain.  Harderest to clasp, but most secure.

Figure 8 Clasp:  A more artistic version of the lobster clasp. Works the same, but is prettier with more rounded edges.

S Clasp- The S clasp is relatively easy to put on. It is shaped like a letter S. One side of the S is usually permanently closed shut, while the other end is open to slide a jump ring on and off. Easier to put on, but slightly less secure. Small chance of unclasping and becoming loose.


Hook and Eye:  Very simple design and very easy to put on. Can come undone.  I have found it more sturdy when using heavier beads.


Toggle:  The large hole in the clasp makes this very simple to put on and take off.  But that large hole makes for a very unsecure design -especially in bracelets.  Some designs are more secure then others so test is out first!  Usually available in many different shapes and sizes. 


Sliding Bar:  Great for multi stranded necklaces or bracelets. This clasp is fairly easy to slide on and off, but has a small risk of sliding apart while wearing. Found it less sturdy with heavier pieces.


Box:  Very secure and pretty, but more expensive.  


My favorites are the figure 8 lobster clasp and the hook and eye. What are yours?

Wrap it up

I've been wanting a Chann Luu wrap bracelet for as long as I can remember.  They remind me of the friendship bracelets I made as a younger girl, except these are way more stylish...
Source: chanluu.com via Katie on Pinterest

Here are a few other versions...

Marathon Strand Bracelet

Gorjana Triple Wrap
Look for updates on my own version of the wrap bracelet!

5.19.2011

Crafty Spaces

I dream of the day when I have enough space for a craft room

For now, I am imagining it will look like this... 

Love the peg board, but also the shelving unit under the desk. It's from Ikea and I bought one a year ago to be the new home for all my crafts. Its very spacious and has a drawer for every craft!


Pottery Barn
Classic Pottery barn + craft spaces = perfect

From Apartment Therapy
Love the colors...It's like a yarn store in your very home! (My mom should totally do this).

From Craft Addict

Another peg board, perfect for any jeweler! One spot for all her beads, supplies, and tools. Saves desk room and is clutter free!

5.18.2011

The Cupcake Social

It can take tons of time to make cupcakes pretty (who doesn't want to eat a pretty cupcake?), but then all there is to use is the same boring cupcake liner. 

Why not use liners that are colorful and pretty?   Like these....

Pink Liners

Striped

Pretty Pastels

Paisley

All liners are from The Cupcake Social on Etsy. 

5.17.2011

An Easy Way to Cut Chain

I don't know about you, but I could spend hours counting out individual links of a 1mm chain just to make a simple piece.

Save time and money....

Count out how long you want your chain to be (1 inch, 12 links, whatever).  Once you have your ideal chain length, take a tiny piece of wire (I use 26 gauge depending on the weight of the chain) and thread it through the top link of the chain. 


While holding the wire with the chain hanging in one hand, thread another uncut chain link through the wire. 


Let it hang down then cut it so it is even with the first chain length.


 It's so easy and quick!

5.16.2011

Pretty Pales

I've noticed a lot of the jewelry trends are pointing to large pale colored stones and large jewelry pieces...


Jade Drops Bracelet
                                                                        Source: shop.nordstrom.com via Katie on Pinterest


Kenneth Jay Lane Bib Necklace

If you want to create your own...

Rainbow Quartz Teardrops
 These would make a great necklace. Maybe multiple strands with various placement of the gemstones dropping down? Maybe clusters of teardrops mixed in with some larger gemstones to make a chunky mid-length necklace?


Faceted Amazonite Teardrops
Amazonite is one of my favorite stones. These milky light blue stones remind me of clouds with the swirl pattern of blues and white.  Could make great simple drop earrings by themselves or add a small cluster of beads at the top.

5.13.2011

Polka Dot Garland

I was recently looking at BHLDN for the new decorations they added to their website. To my surprise, they were selling this garland of hanging circles...

Which is extremely similar to this garland my roommates and I made for a party last year....


It was really simple to make!  

All you need is:  
String (cut in whatever length you would like)
Glue
Paper  - We used glitter paper from Papersource - It was fairly thick so it held up nice.
Something to help you cut circles in different sizes (like this)

After cutting various sizes of circles (make sure each circle has a pair), we took one of the largest circles and put it nice side down on the table.  Make a line of glue down the center where your string will be attached. We then took the start of the string and placed it over the glue (leaving a few inches of string hanging out the top and a lot hanging from the bottom).  Add some more glue to the string and around the outer edges of the circle.  Then place a circle of the same size over the string, nice side facing up.  You are basically sandwiching the string in between the two circles.

Repeat this for each circle. We started with the largest on top and decreased in size as we went down the string...Feel free to get creative with it...there are tons of ways you can do it!


5.11.2011

Etsy Artist: Bag Noir

I love scouting Etsy for new designers! There are some amazingly creative people out there!

Source: etsy.com via Katie on Pinterest


I'm a sucker for anything with Peacock feathers so this bag was no exception!

Source: etsy.com via Katie on Pinterest


The lining is even gorgeous!

Source: etsy.com via Katie on Pinterest


Source: etsy.com via Katie on Pinterest


Check out the whole collection at Bag Noir!

5.10.2011

Barefoot Contessa's Apple Tatin Cake

 Simply put, Ina Garten has amazingly yummy recipes. Clicking through the channels while making my Derby hat last week, I caught her at the very end of making this dessert.


Apples, caramel and cake...whats not to love? So we made it that night for dessert.

 Here is the recipe from the Food Network :

  • 6 tablespoons (3/4 stick) unsalted butter, at room temperature, plus extra for greasing the dish
  • 1 1/4 Granny Smith apples, peeled and sliced into 12 pieces
  • 1 3/4 cups granulated sugar, divided
  • 2 extra-large eggs, at room temperature
  • 1/3 cup sour cream
  • 1/2 teaspoon grated lemon zest
  • 1/2 teaspoon pure vanilla extract
  • 1 cup plus 2 tablespoons all-purpose flour
  • 1/2 teaspoon baking powder
  • 1/4 teaspoon kosher salt
  • Confectioners' sugar
*Preheat the oven to 350 degrees F.

*Generously butter a 9-inch glass pie dish and arrange the apples in the dish, cut side down.

*Combine 1 cup of the granulated sugar and 1/3 cup water in a small sauce pan and cook over high heat until it turns a warm amber color, about 360 degrees F on a candy thermometer. Swirl the pan but don't stir. Pour evenly over the apple slices.  **If you don't have a candy thermometer its okay.  Just watch the sugar's color and as soon as it starts turning, take it off the heat.  This happens very fast, so be ready!

*Meanwhile, cream the 6 tablespoons of butter and the remaining 3/4 cup of granulated sugar in the bowl of an electric mixer fitted with the paddle attachment, until light and fluffy. Lower the speed and beat in the eggs 1 at a time. Add the sour cream, zest, and vanilla and mix until combined. Sift together the flour, baking powder, and salt and, with the mixer on low speed, add it to the butter mixture. Mix only until combined.**I have a little secret....We made the cake from a box. I am the first person who would rather make something from scratch, but boxed works when your low on time.

*Pour the cake batter evenly over the apple slices and bake for 30 to 40 minutes, until a cake tester comes out clean. Cool for 15 minutes, then invert the cake onto a flat plate. If an apple slice sticks, ease it out and replace it in the design on top of the cake. Serve warm or at room temperature, dusted with confectioners' sugar.

 It didn't take long for someone to take the first taste!

5.09.2011

Stamping: Stationary DIY


Why spend tons of money on ordinary stationary that just about anyone can buy? I love the idea of taking simple and plain cards and envelopes and personalizing them for a specific occasion.  In this case, I wanted to add a little something special to a white envelope.

My love for paper source started with their large collection of stamping supplies.  You can purchase everything you'll need from them!


What you'll need:
*Plain envelopes
*Ink Pad - I used Color Block's 8 pigment wheel in Enchantment
*2 stamps of similar shape and design  (I used: here and here) - Small and Large sizes
*Superfine Clear Embossing Powder
*Heat tool
*Pad or paper for shaking embossing powder over


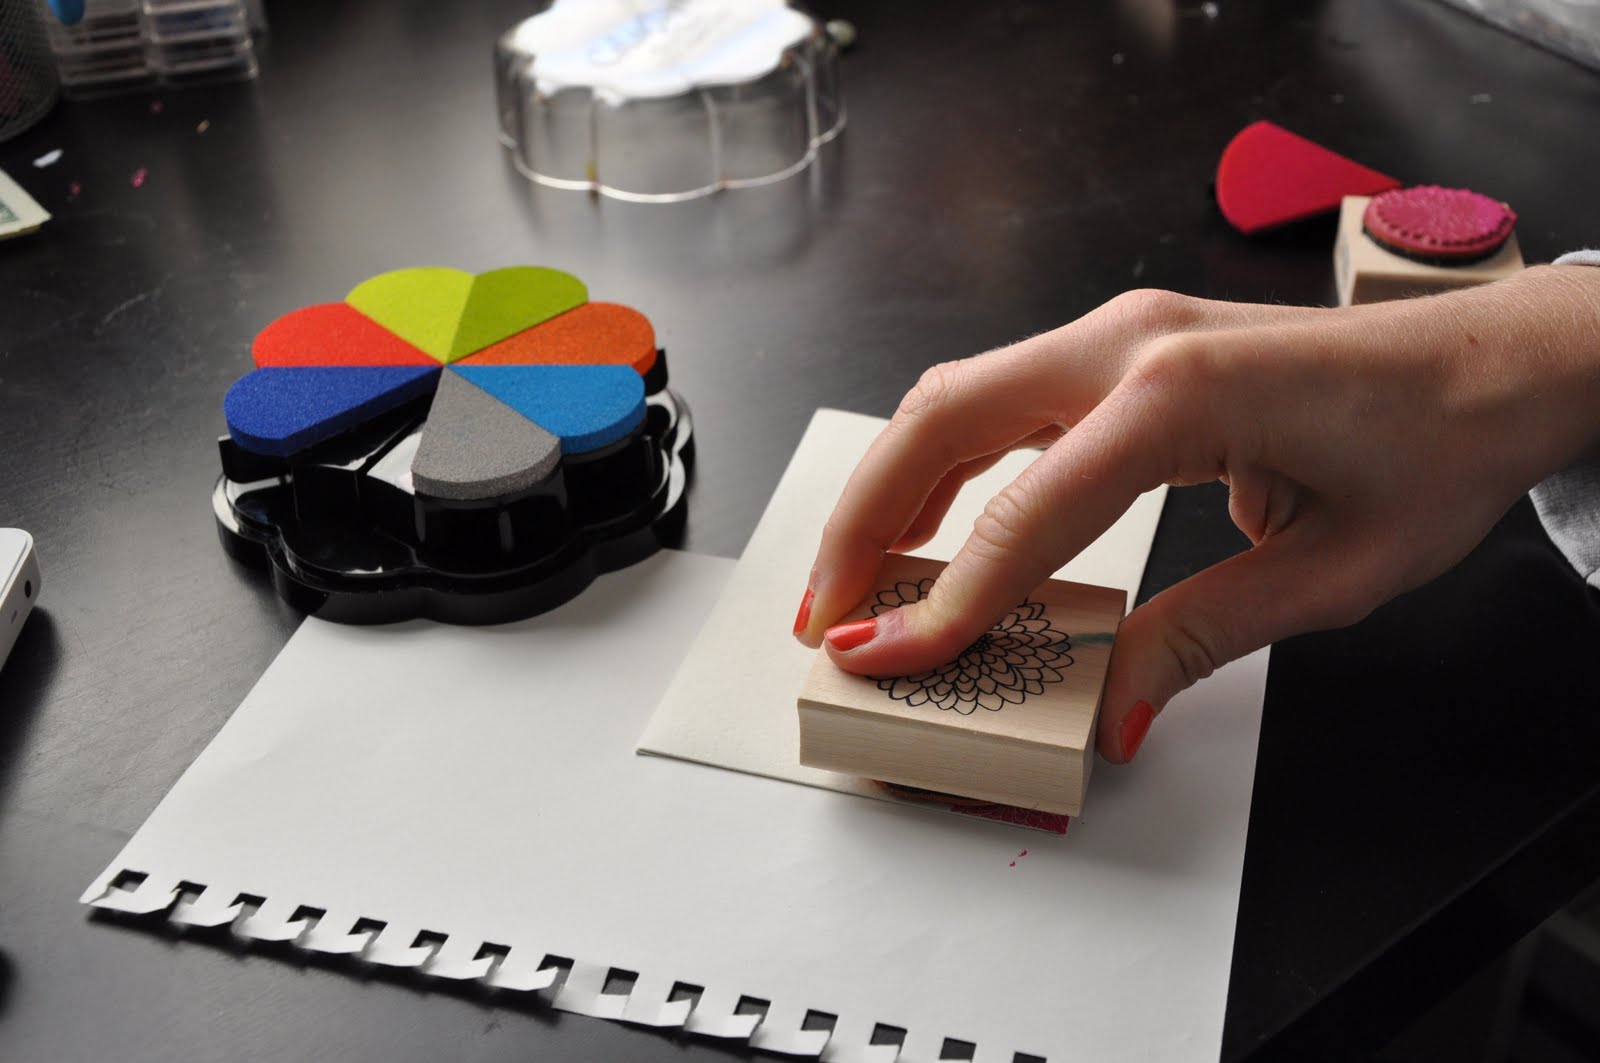
 After inking the first stamp, press down on corner of envelope so that stamp covers entire corner (even hangs off slightly).
 Ink larger stamp.
 Place larger stamp over the first stamp.  I like to place it above and slightly to the side. 
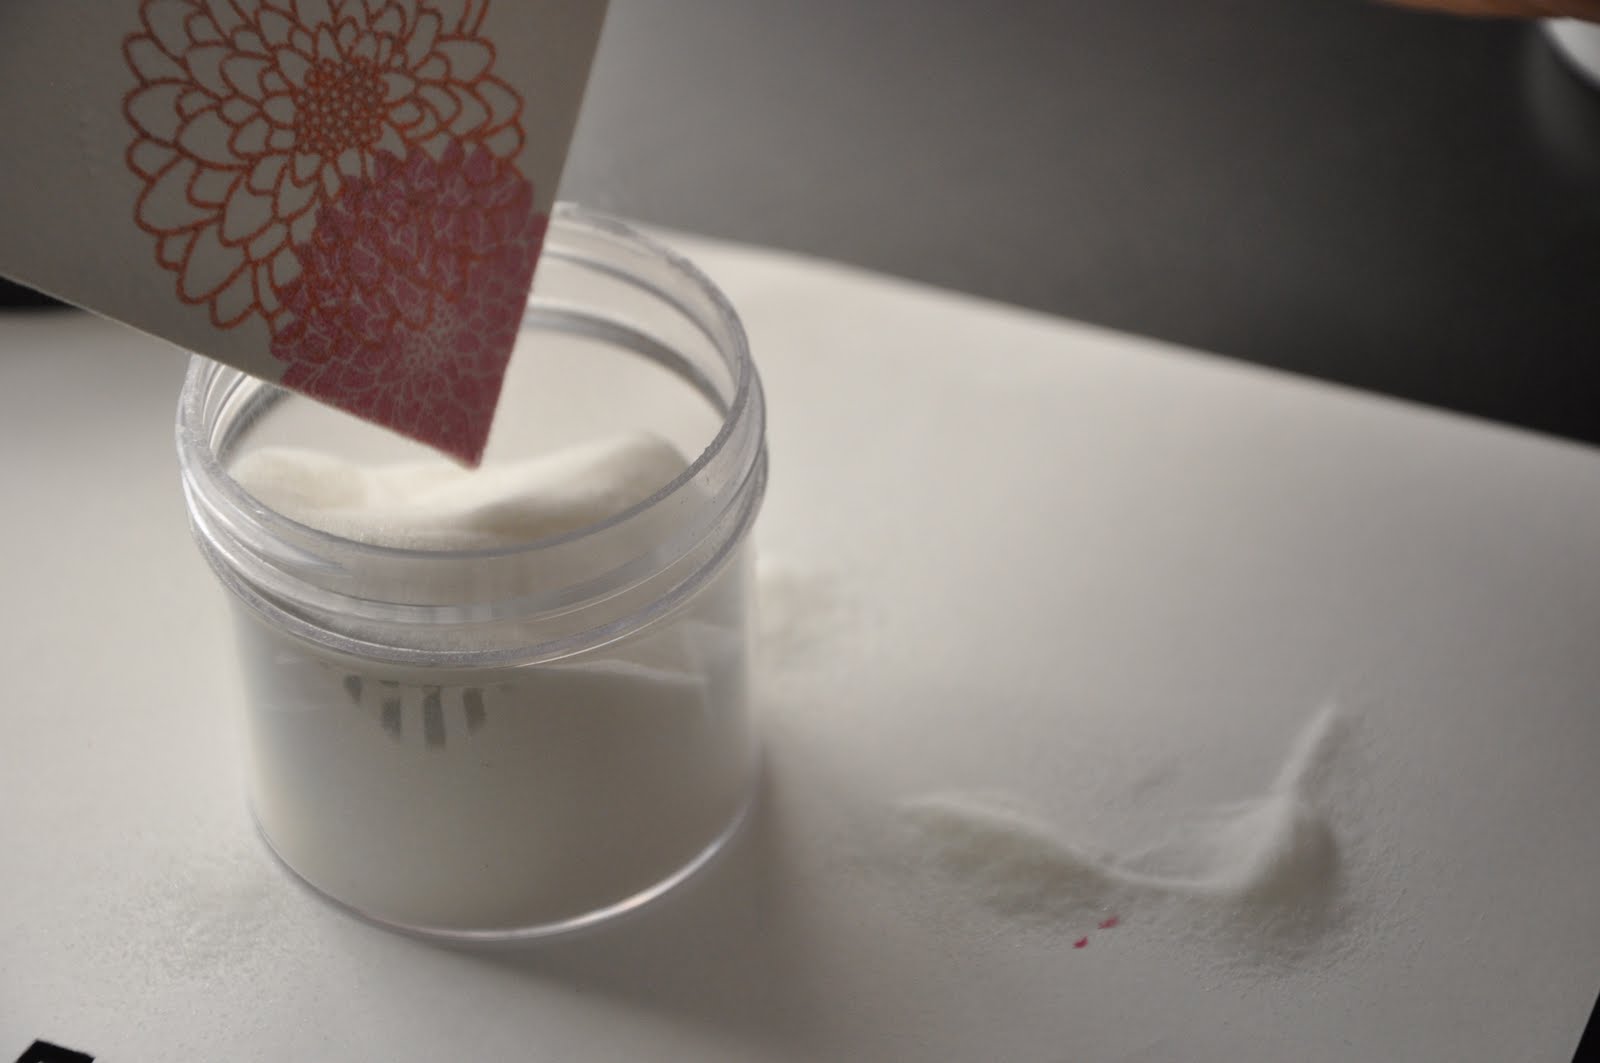
Once the inking is complete, sprinkle embossing powder over entire stamp. 
 Should look like a small mountain of powder.
Dust off excess embossing powder back into jar. 
 
 The stamp should like slightly raised and dulled in color with the embossing powder on it.
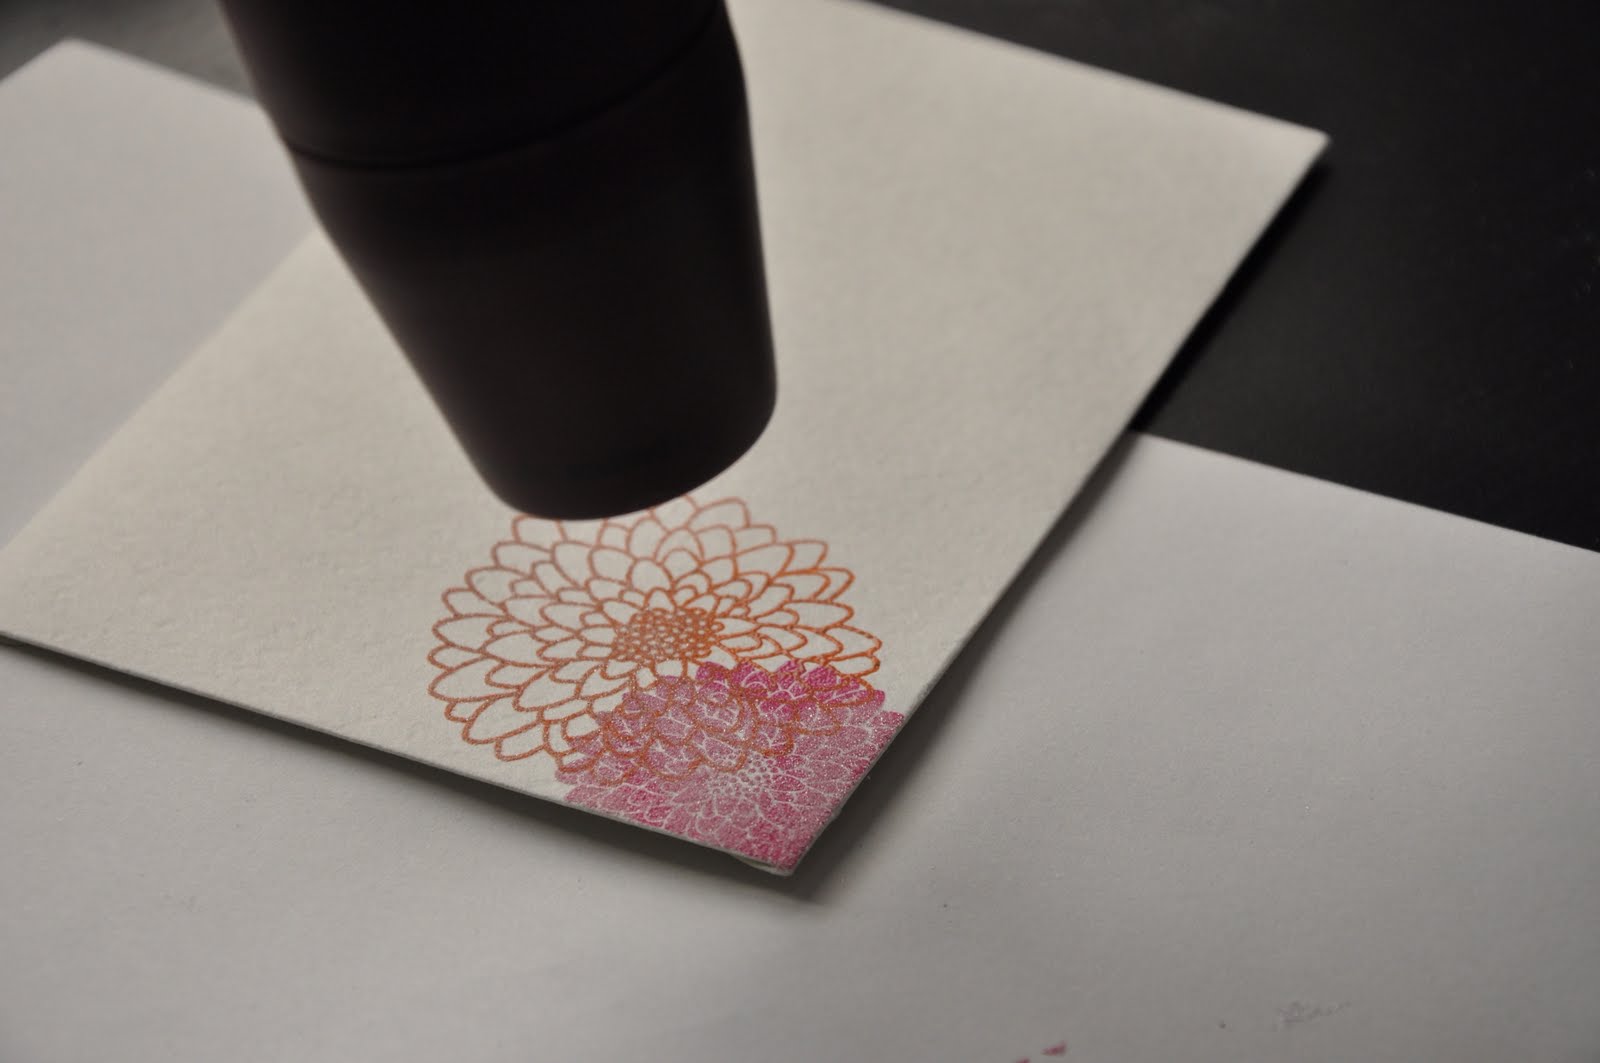
 In a circular motion, move the heat gun around the stamp so it evenly melts the embossing powder.
 The stamp will begin to look shiny in some areas and powdery in others. Your all done when the entire stamp is shiny and puffed up.
Like this!
 
 All done!